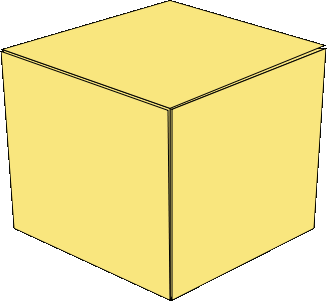
This is a long overdue diagram for my cube pattern. Many people would consider the cube a very simple shape, but making a good one that meets certain qualifications can be quite challenging.
Typically, when you search the web for origami cube patterns, you will find references to one that I've also seen presented as a "balloon" in a book my sister had when we were kids. The pattern works, and you can get a cubic shape out of it, but it has some flaws that always bothered me. First, it has large folds of paper on the outside, rather than the smooth planar faces one might expect. Also, it does not make optimal use of the paper, having most of it folded into obscurity.
A more advanced cube I once saw did have smooth, flat faces. It worked by folding the paper into a 5x5 grid, and collapsing the faces into the cube, wrapping part of it around itself. That worked quite well, but still did not make optimal use of the paper and I never liked having to divide it into 5ths.
So I was quite pleased when I managed to design the cube I present here. Not only does it have no creases or seams on any of the faces, but it also uses a piece of paper that is only divided into a 4x4 grid. Despite how few squares this gives you to work with, it has no openings on any part, and quite firmly holds itself together.
Alas, I have found that I am not the first one to design this cube. I found another one online that works exactly the same way (Kasahara and Takahama 1987, pp. 58-59), and pre-dates mine by almost two decdes.
1  Start with a square piece of paper and pre-crease it in a 4x4 grid.
|
2  Pre-crease the three mountain folds and four valley folds as shown. In this picture, the
six darker orange squares will form the outside faces of our cube, and the remaining
faces will be tucked inside.
|
3  At this step, it is VERY IMPORTANT
to crease the existing folds in the directions shown here. This will make it much easier to collapse the cube together.
Bring point C towards point B, allowing the paper to collapse together without forming
any new creases.
|
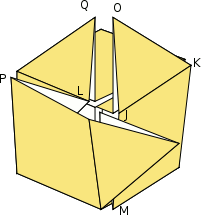
4  As you collapse the shape together, point A, at the center of the paper, will form one of the
corners of the cube. Now bring point D in to meet point E (which is hidden from this perspective),
while allowing the crease B-J to bend to a 90° angle.
|
5  Now bring point F down to meet point K, allowing the crease C-L to bend to a 90° angle.
While you do this, the corner "I" will rotate downwards as well.
|
6  You should now have a shape that looks like this. We're now going to rotate it 180°
around the vertical axis to see the other side.
|
7  Bring point N up to meet point H, rotating around the existing crease. At the same time,
the edge betwen J and M will rotate around to meet the edge between H and I. The corner
of the paper at point O will move upward, as will point N, which will be tucked inside the shape.
|
8  Bring point L across to meet point H. As this happens, point Q will close to a corner meeting
point O at the top, and you will be left with three triangles protruding from adjacent edges
on the cube.
|
9  This should give you a full cube with three right triangles protruding. Each of those triangles
lines up perfectly with a pocket on the adjacent face.
|
10  Tuck each of those three triangles into the adjacent sleeve, snugly plugging them in.
|
11  You now have a proper cube, with no creases or seams on any of the faces, no gaps on the corners
or edges, and which uses the maximum possible amount of paper on the outer surface.
|