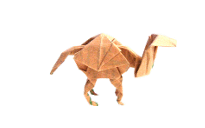
This dromedary camel is one of my more popular shapes. I originally stumbled upon it when designing a giraffe, which uses very much the same pattern. This is fresh off the press (or actually, off my desktop PC using Inkscape), and I'm pleased to present it here.
1 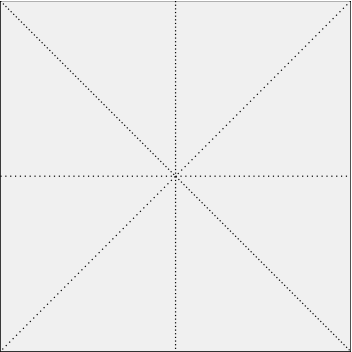 Starting with the blank side of the paper facing up, pre-crease the paper vertically,
horizontally, and on both diagonals.
|
2 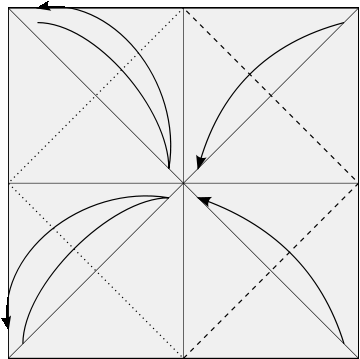 Fold all four corners in to meet the center, and unfold the two on the left.
|
3  Fold the top half of the paper down over the bottom half, enclosing the two flaps that have been folded in.
|
4 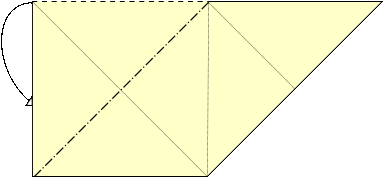 Following the creases already in place, collapse the square corner on the top
left down into the shape, forming two triangular flaps that connect in the center
of the shape.
|
5 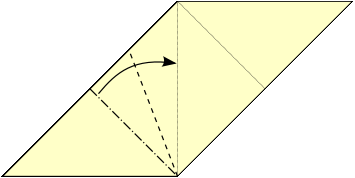 Take the newly created flap in front, and bring its existing 45° crease
over to meet the vertical crease in the middle, creasing the paper halfway between
both creases.
|
6 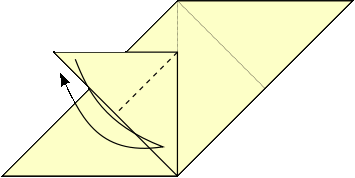 Pre-crease the triangular flap in front diagonally, folding it in half.
|
7 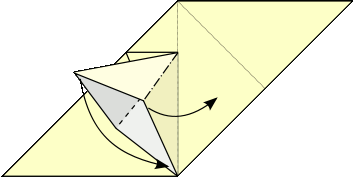 Open up that flap, and flatten it out, forming a square that is oriented diagonally.
|
8 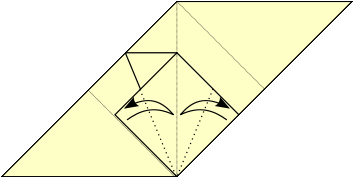 On the diagonal square, pre-crease the bottom two edges, bringing them in to meet the
vertical crease in the middle.
|
9  Now pre-crease the top-right edge of that square, folding it to meet the middle crease
as well.
|
10 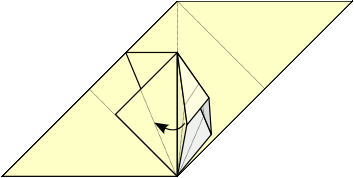 Open up the flap on the right, following the crease you made in the previous step, and
flatten it out, forming an upside-down kite shape.
|
11 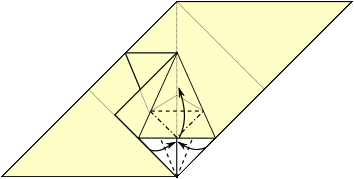 Bring the horizontal paper edge in that kite upwards, causing the bottom edges of it to
collapse together, forming a diamond shape with a small right triangle protruding upwards from the
middle.
|
12 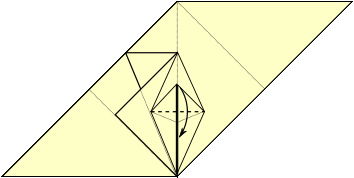 Fold that right triangle back down, forming a new horizotal crease at its base.
|
13 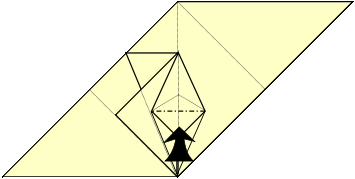 Now collapse that right triangle up into the shape, plugging it into the isosceles triangle
above it.
|
14 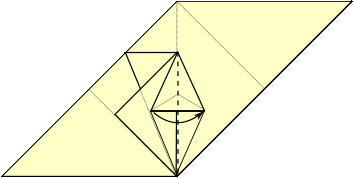 Fold the left flap of that diamond shape over to right.
|
15 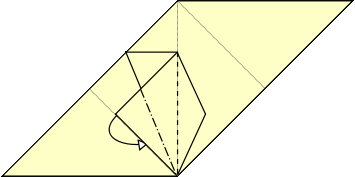 Tuck the bottom left edge of the active face into itself, following the crease made in step 8
|
16 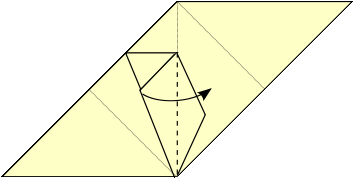 Now fold that flap over to the right, following the center vertical crease.
|
17 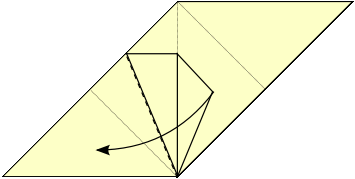 And flip the entire top layer on on which we're working back over to the left, unbending the
fold we made in step 5.
|
18 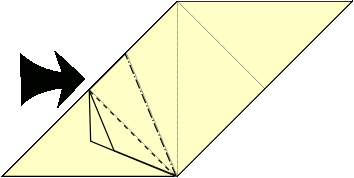 Collapse the front-left appendage into itself. The 22.5° crease will become a mountain
fold, and the 45° crease will become a valley fold. This will encapsulate the work we did
on steps 6 through 17 within the half-kite triangle on the left side of the center vertical crease.
|
19 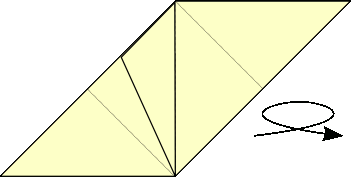 Flip the shape over.
|
20 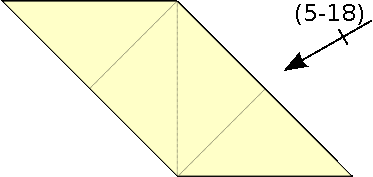 Repeat steps 5 through 18 on the opposite side (with a reflection on the X-axis of all instructions).
|
21 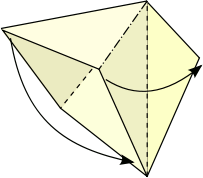 Open up the triangle that is the left side of the shape, and collapse it down into a diagonal square.
|
22 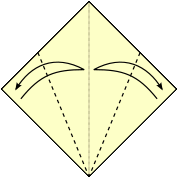 Pre-crease the shape, bringing the bottom two sides of the front square in to meet the center vertical crease.
|
23 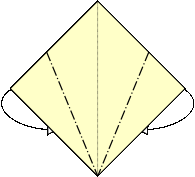 Now fold those two bottom edges into the shape, following the creases already made, and forming a kite shape.
|
24 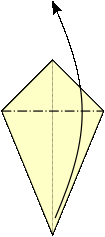 Fold the top layer on the bottom side of the kite shape upward, forming a horizontal crease at its left
and right corners.
|
25 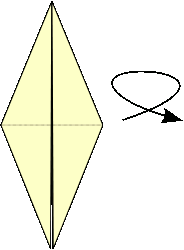 Flip the shape horizontally.
|
26 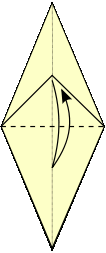 Pre-crease the square corner that is protruding from the middle of the shape, folding it down and
back up to form a right triangle.
|
27 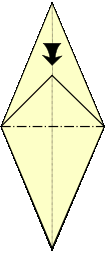 Now collapse that corner (with all four edges that taper off of it) down into the shape. There is an important detail in this step that is not shown in the diagram here. When that upper pyramid shape is collapsed down into the body of the camel, there are a few positions it can go into relative to what's already there inside the body. If you look at the image in step 29, you'll see that one side has a protruding triangle and the other does not. The protruding triangle will become the camel's neck, and the other end its rear legs and tail. On the underside of the body, when you invert this corner, the paper that connects to those rear legs can end up either pinched between the rear corners of that pyramid (the two left ones in step 29) or surrounding it. It is important that they end up being pinched in between. If not, then later steps will be impossible. Photographs showing what I just described here will be available shortly. |
28 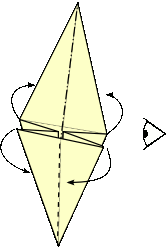 Fold the two front flaps together, and also the two rear ones. We're now going to change our perspective,
looking from the side of the shape.
|
29 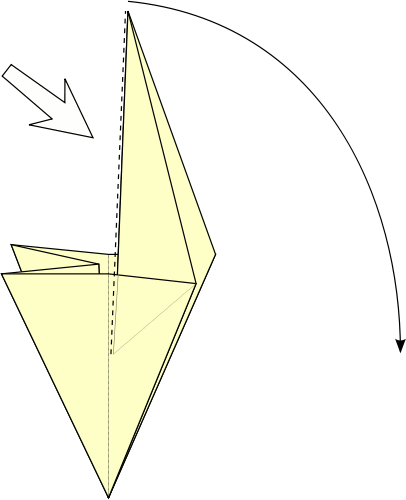 Zooming in 200% here. Invert the spine of the tall flap on the left, and bring it down 90°,
so that it protrudes horizontally to the right.
|
30 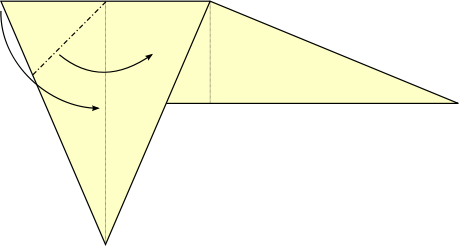 Bring the top left corner on the front side of the shape out, opening the triangle it belongs to and forming
a new crease as shown in the diagram.
|
31 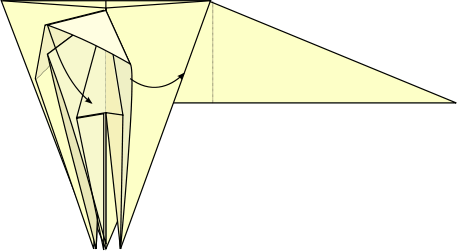 As you open it up, collapse it outwards, toward the right. On the innermost layer, the isosceles triangle
that we created in step 13 should open up.
|
32 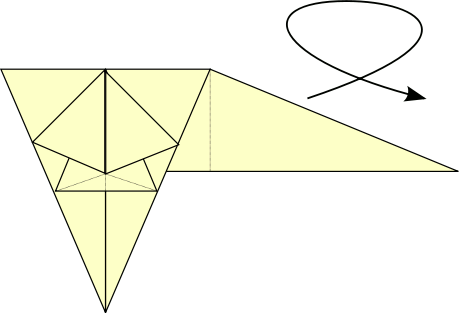 Flip the paper over horizontally...
|
33 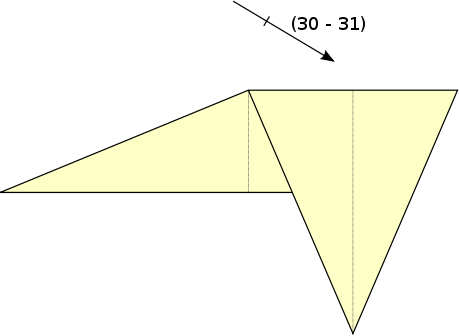 ... and repeat the same operation on this side.
|
34 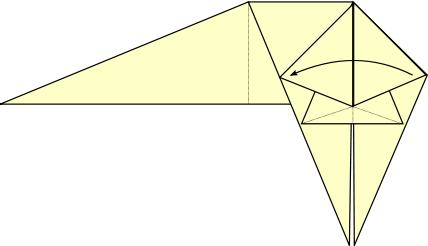 Take the top flap of the right end, and flip it over to the left.
|
35 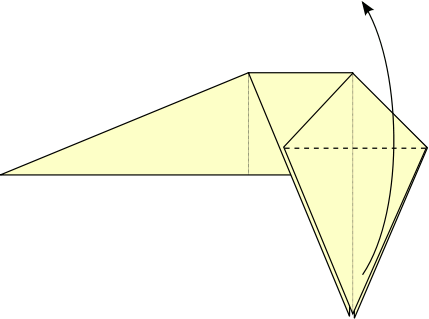 Now take the triangle on the bottom side of the diamond shape that we're looking at, and fold it upwards.
|
36 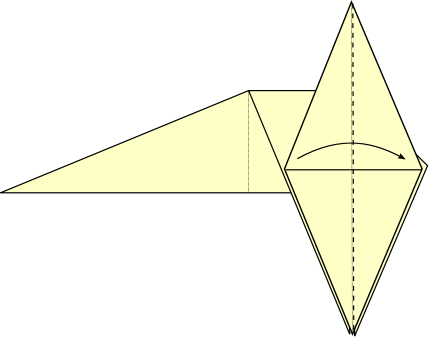 Then fold that same flap back toward the right.
|
37 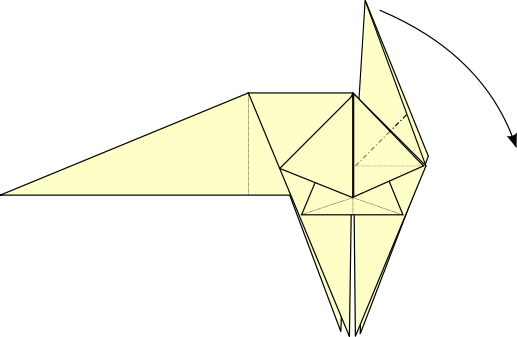 The triangle that's pointing upwards will be the tail of our camel. Fold it down into itself, inverting
its spine and making it point towards the right.
|
38 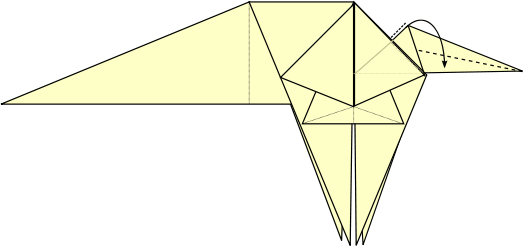 Now fold the top right edge of the tail down into itself to line up with the bottom edge.
|
39 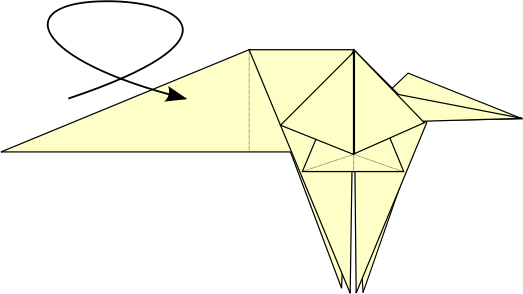 Flip the shape horizontally...
|
40 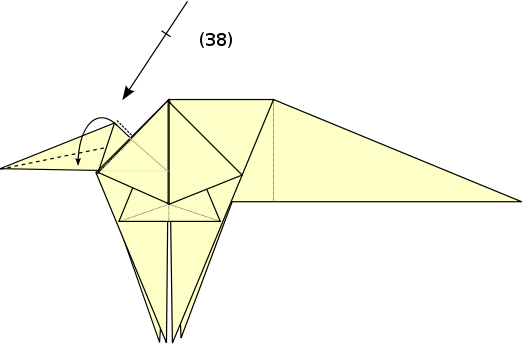 ... and repeat step 38 on the other side.
|
41 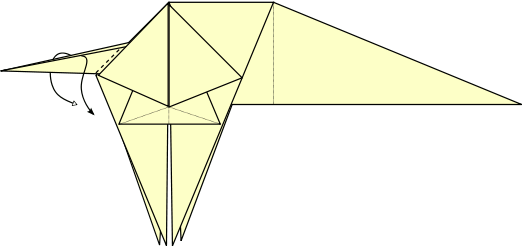 Invert the tail near the edge of the torso, making it point downward.
|
42 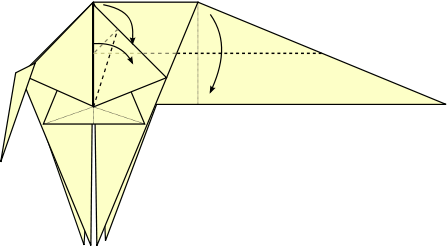 At this step, we're going to make the neck of our camel narrower, folding it in half vertically. This is somewhat difficult to convey through diagrams, as we're not working with a flat surface. The top of the camel's neck currently intertwines with existing layers of the triangle that will become the hump. As you fold that edge down, you'll be sort of peeling it off of the the hump, and folding it down toward the camel's neck and belly. As you fold this edge down, it will line up with the edge that is the bottom of the camel's neck, but not with the triangle that is part of the camel's hump (see step #44 to clarify how it should look after the fold is completed. |
43 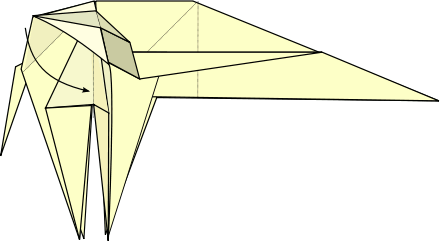 Just an intermediate image to clarify the folding (albeit poorly).
|
44  Now flip the shape over...
|
45 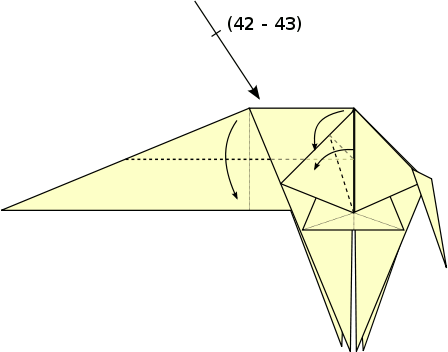 ... and repeat the same operation on the other side.
|
46 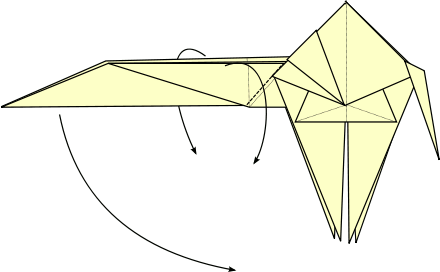 Now invert the neck where it connects to the torso, pointing it downwards.
|
47 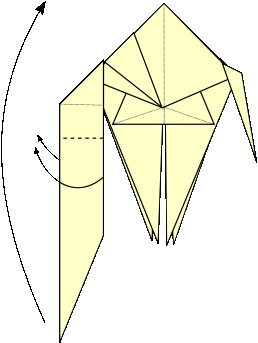 Then fold it back up in the opposite direction.
|
48 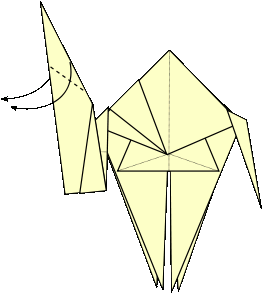 Invert the tip of the neck, forming the head pointing it forward.
|
49 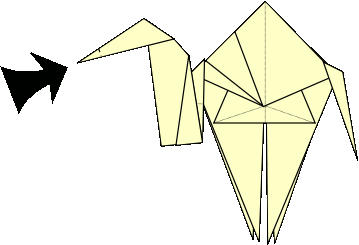 fold the tip of the head back inside, giving it a more rectangular nose.
|
50 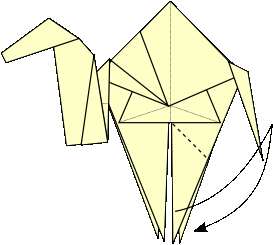 Now we'll concentrate on one of the legs. Pre-crease one leg, folding it
up so that its inside edge lines up with the bottom edge of the camel's torso.
|
51 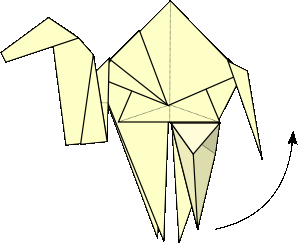 Then bring the leg upwards, tucking it into that same crease.
|
52 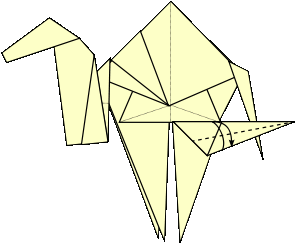 Pre-crease the front side of the bottom edge of the leg, folding it up to align with the bottom edge of the torso.
|
53 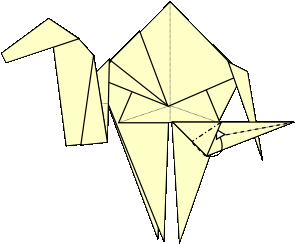 Then collapse it into the leg.
|
54 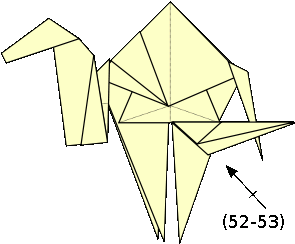 ... and repeat that operation on the other side of the same leg.
|
55 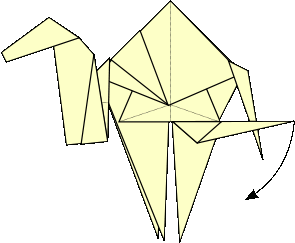 while pinching the triangle that is the top of the leg, pull the bottom end of the leg down.
That will distort the triangle you're pinching, while changing the angle of the leg. It should
wind up pointing down and slightly to the outside
|
56 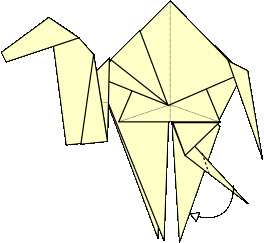 Now invert it, moving it forward to form the knee.
|
57 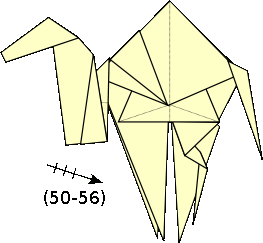 Repeat steps 50 through 56 on the other three legs, changing the direction where appropriate...
|
58 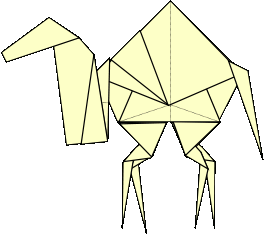 ... which should give you a shape like this.
|
59 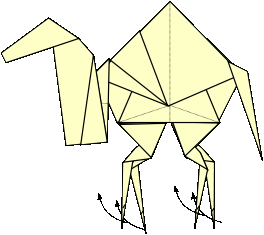 Now bend all four leg tips forward, forming the feet.
|
60 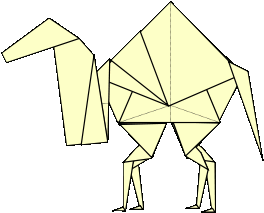 And you now have a dromedary camel.
|